Page Builder — Complete Guide
Welcome to the comprehensive documentation for the no-code page builder. Learn how to create sites, structure layouts, add components, and publish your content.
Workflow Overview
Core Features
Drag & Drop
Construct pages visually using pre-built sections and components.
Instant Updates
Push your draft changes live with a single click.
Secure Links
Generate shareable links for your published pages easily.
PDF Ready
Export any published page as a formatted PDF document.
Create a Site
The first step to building pages is creating a site container to hold them.
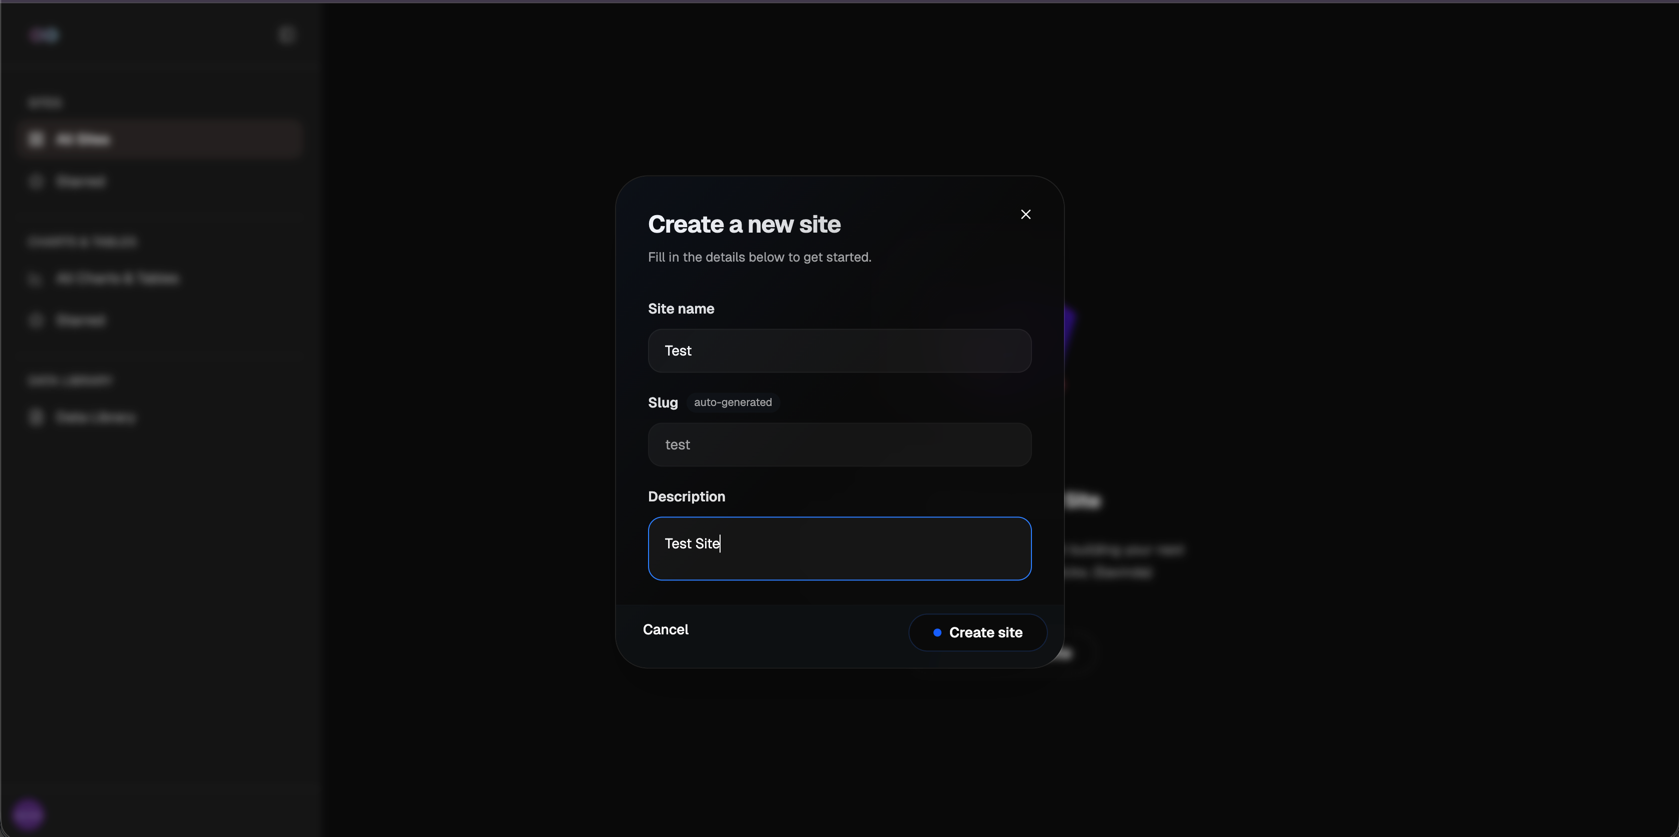
Creation Steps
-
Open Dialog
Click the "Create Site" button from your dashboard.
-
Enter Site Name
Provide a clear, recognizable name for your project.
-
Add Description
Optional: Provide context on what this site is for.
-
Click Create Site
Confirm the details to initialize your new workspace.
Site Settings Form
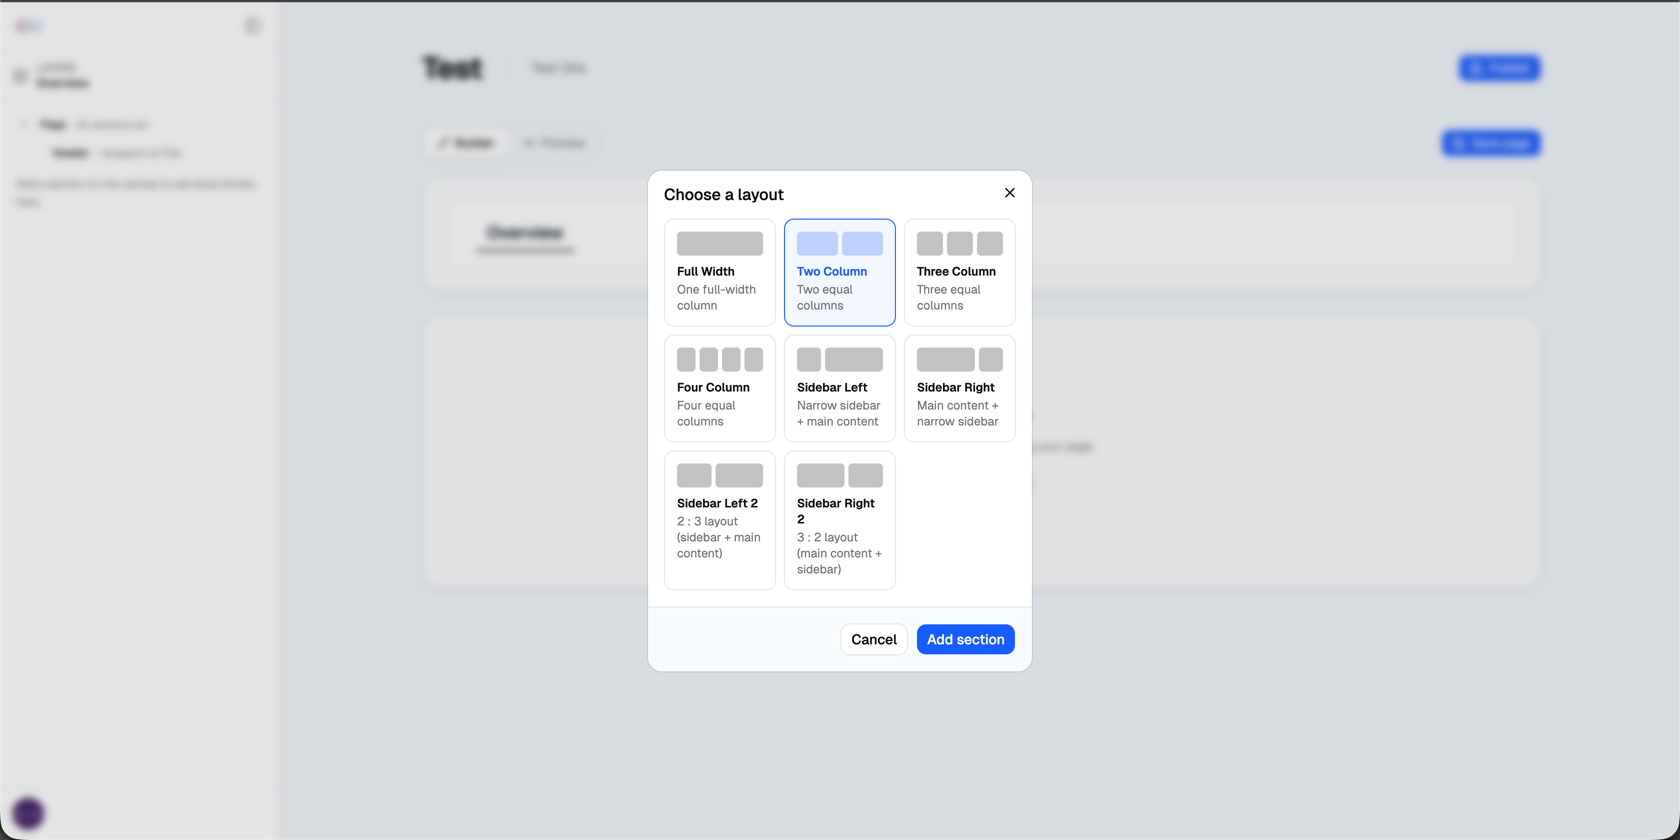
Sections & Layouts
Pages are composed of horizontal sections. Each section uses a specific column layout to organize your components.
About Sections
A section spans the full width of the view. Inside the section, a layout dictates how content is constrained and divided into columns. You can stack as many sections as you need.
Available Layouts
| Layout Name | Description |
|---|---|
| Full Width | Single column spanning the maximum content width. |
| Two Column | Two equal-width columns (50% / 50%). |
| Three Column | Three equal-width columns (33% / 33% / 33%). |
| Four Column | Four equal-width columns (25% / 25% / 25% / 25%). |
| Sidebar Left | Narrow left column, wide right content area (25% / 75%). |
| Sidebar Right | Wide left content area, narrow right column (75% / 25%). |
| Sidebar Left 2 | Alternative left sidebar proportion (33% / 67%). |
| Sidebar Right 2 | Alternative right sidebar proportion (67% / 33%). |
Components
Components are the building blocks of your page. Drop them into the columns of any layout section.
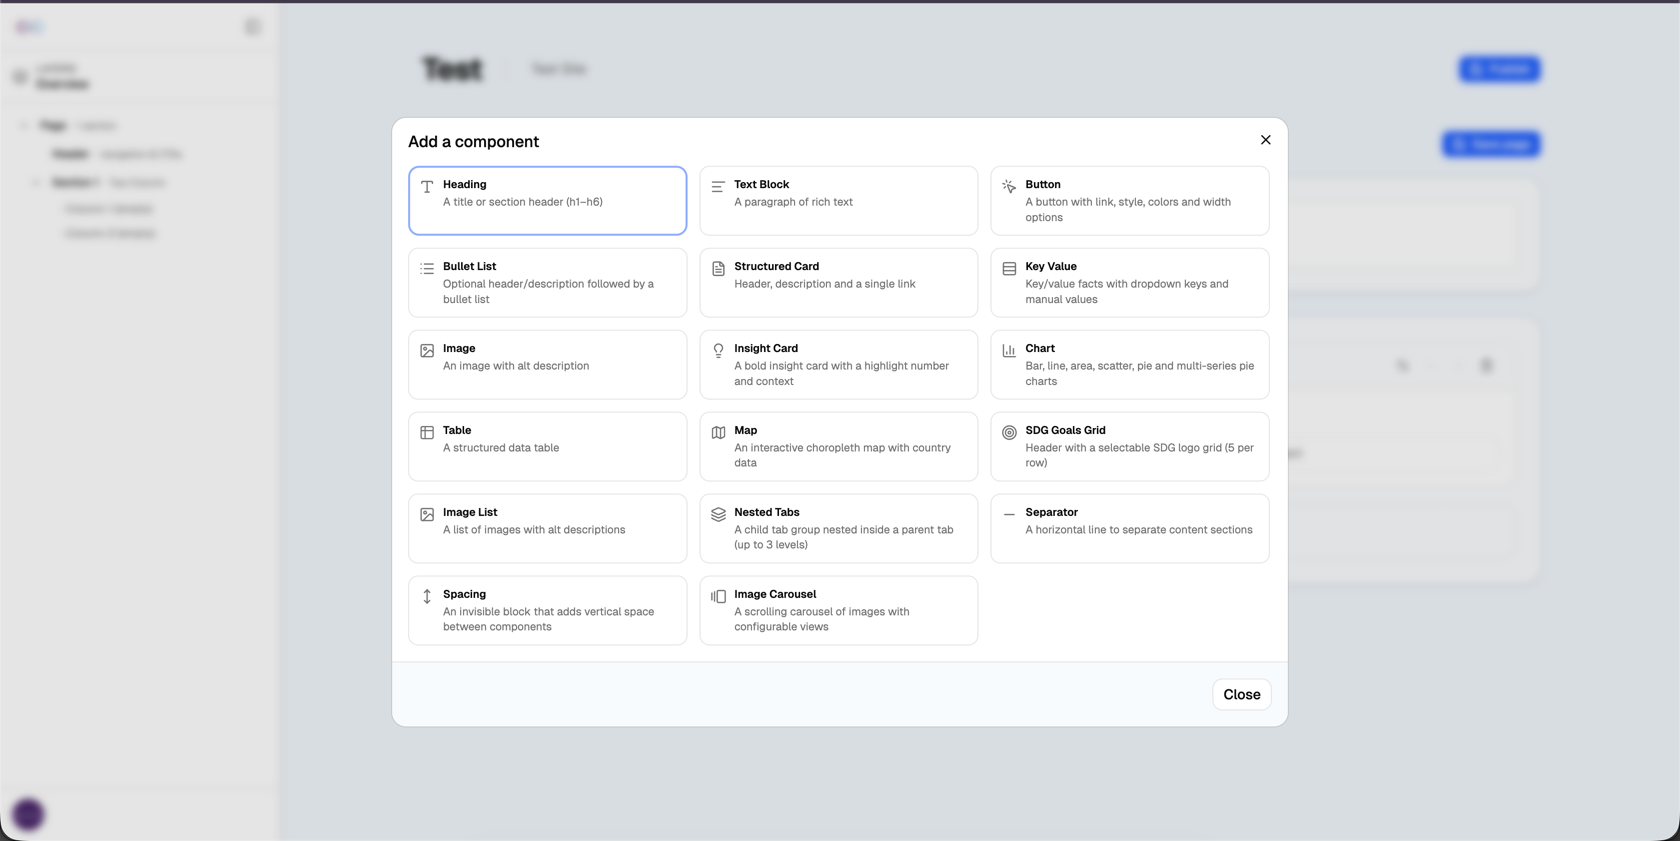
Component Library
Layers Panel
The layers panel provides a structured view of all elements on your page, making it easy to select nested components.
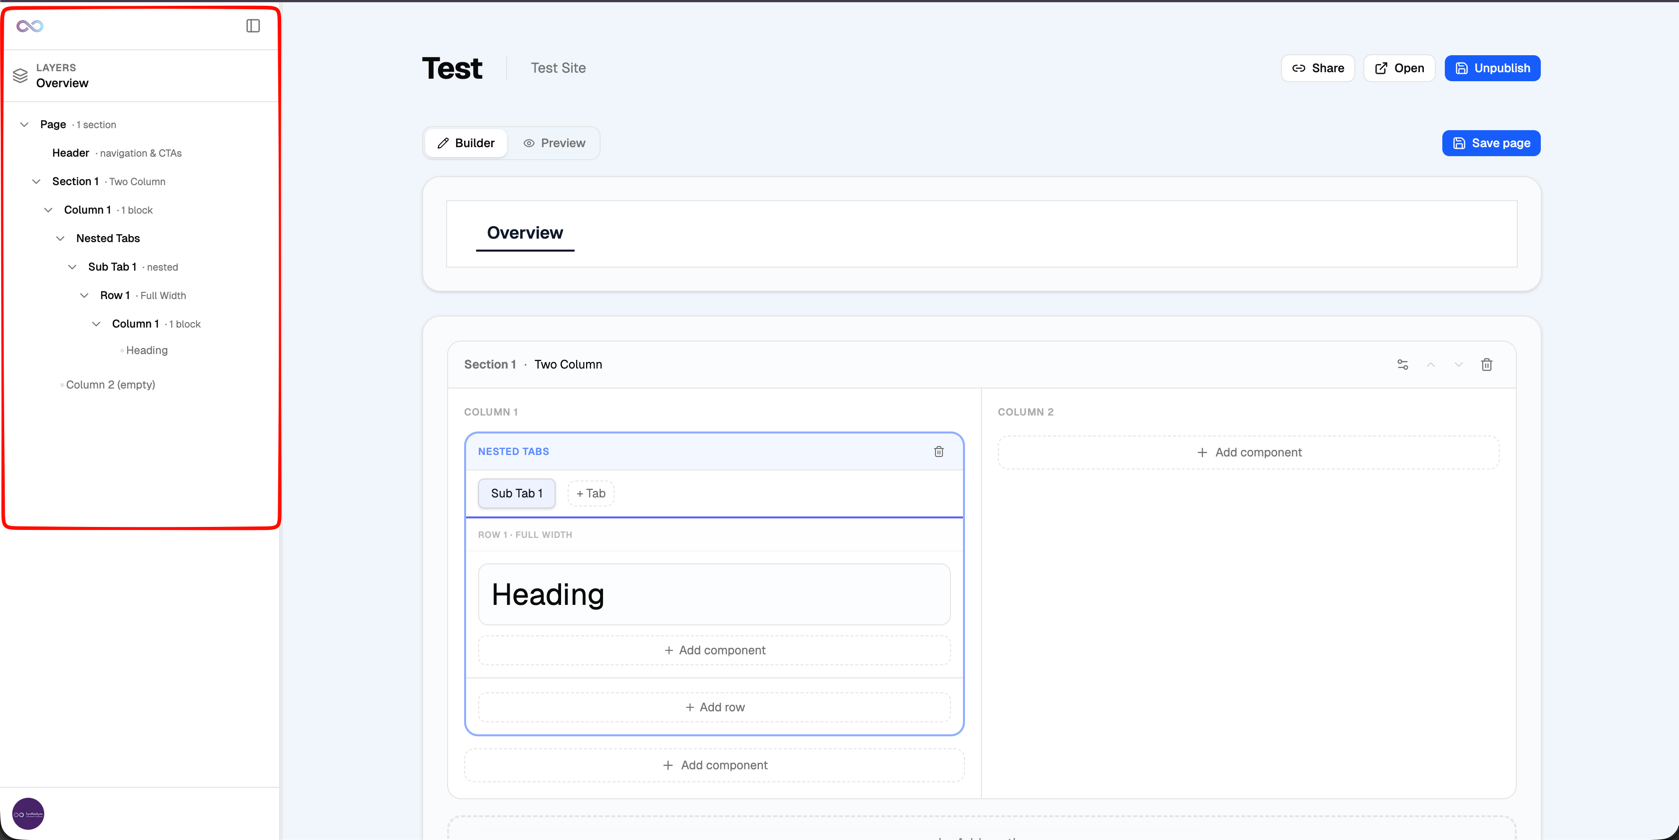
Document Structure
Pages follow a strict hierarchy: Page contains a Header and Sections. Sections contain Columns. Columns contain Components (which may contain further nested elements).
Publish & Unpublish
Control the visibility of your page changes using the publish workflow.

Draft State
When you make edits, they are auto-saved as a draft. Users viewing the live link will not see these changes.
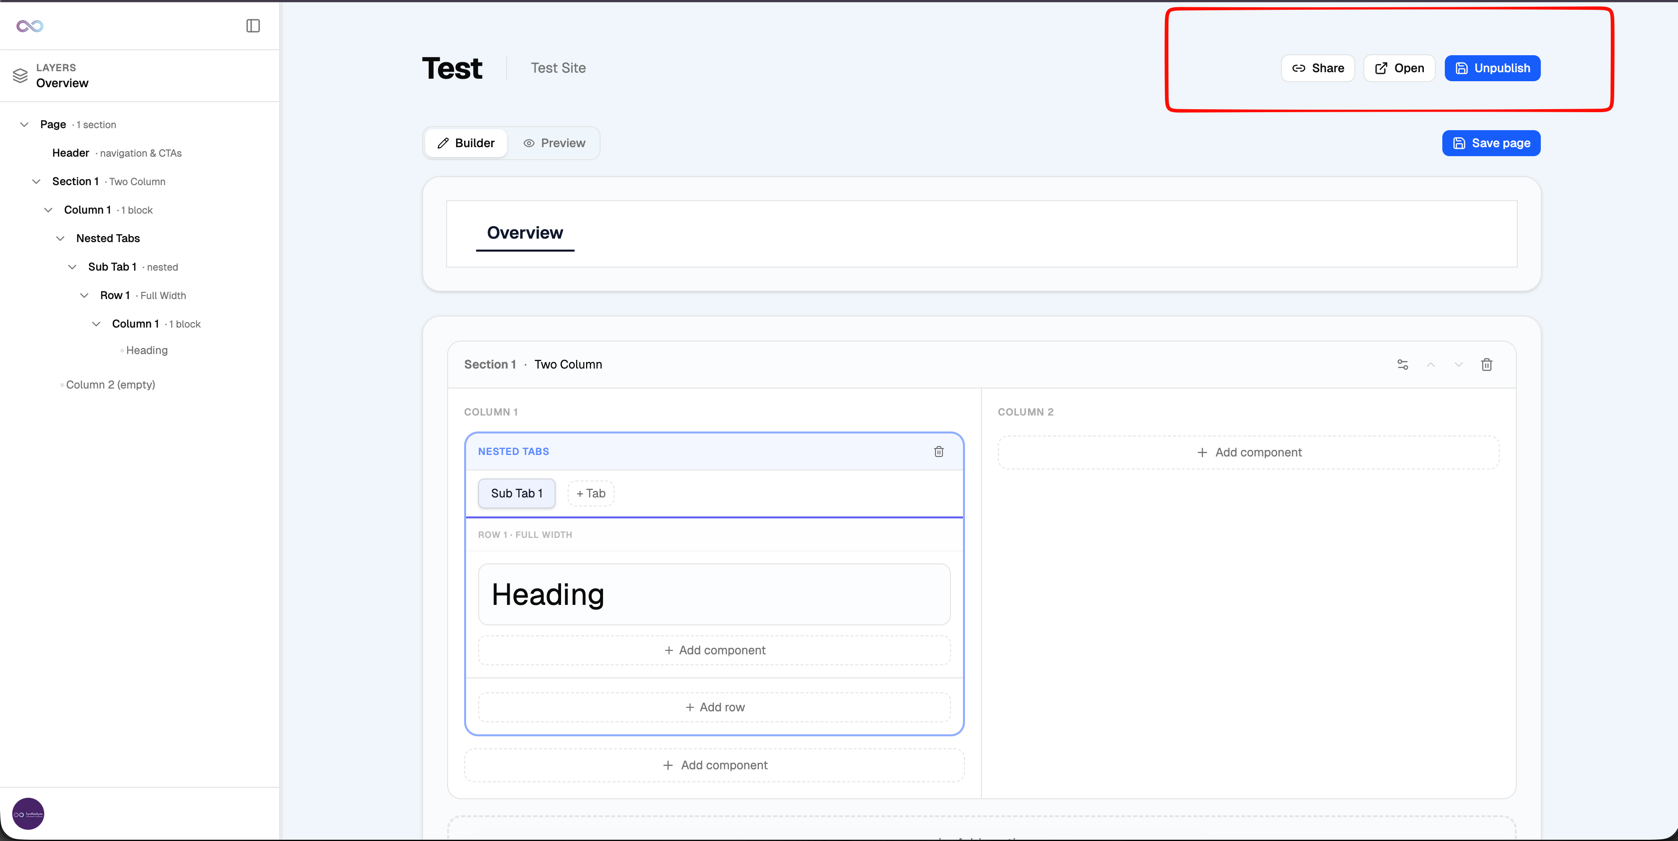
Published State
Once published, the live URL is updated. The editor reveals options to Share, Open the live link, or Unpublish the page.
State Toggle Behavior
Unpublishing a page immediately makes the public link inaccessible and returns the builder to the Draft state. Republishing makes it live again at the same URL.
Share & Open
Distribute your published pages or view them in their final state.
Available only after publishing
You must publish your changes before you can share a link or view the live page.
Share
Clicking "Share" copies the public URL of the live page directly to your clipboard so you can paste it into emails or messages.
Open
Clicking "Open" launches the live, published page in a new browser tab. This is exactly what your users will see.
Download as PDF
Export your finished pages as formatted PDF documents directly from the live view.
How to export
-
Publish the page
Ensure all your latest draft changes are pushed to the live environment.
-
Click "Open" in toolbar
Launch the live version of your page in a new browser tab.
-
Trigger PDF download
From the live page's header navigation, click the download icon or text.
-
Save the file
The layout will reformat for print, and your browser will prompt you to save the resulting PDF file.
Export Tips
- Save before publishing: Ensure there are no unsaved changes in your draft.
- Pre-open nested tabs: The PDF engine will only capture the currently active tab content.
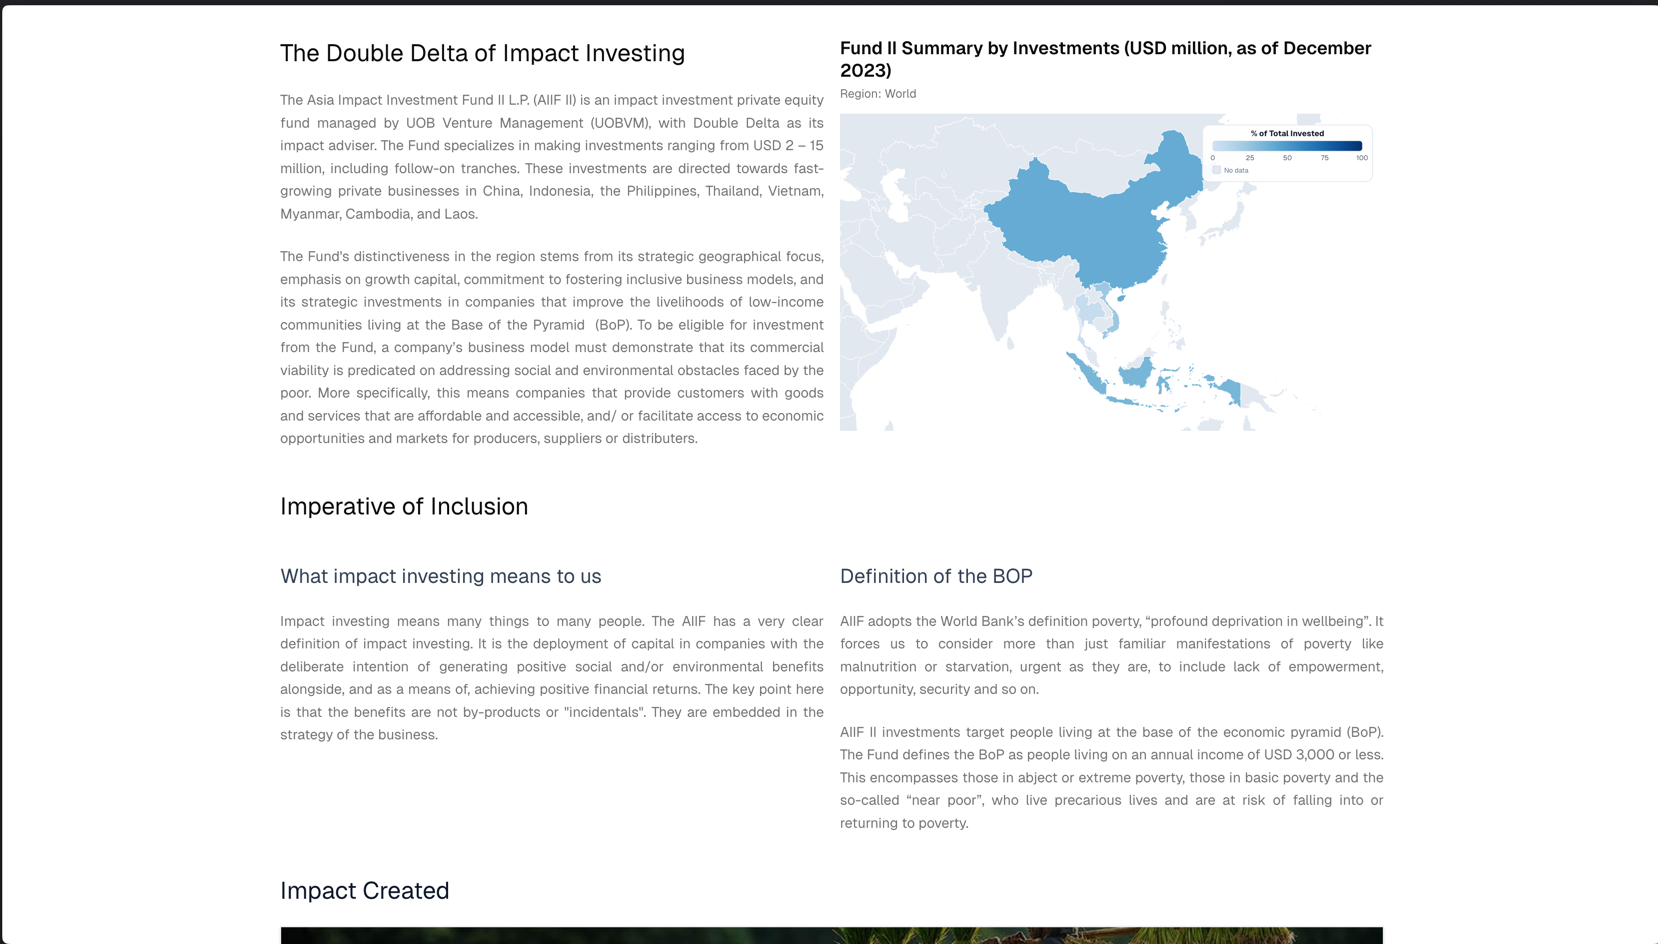
- Verify chart data: Allow a few seconds for connected data charts to fully render before exporting.